March 27, 2026 · simatic-axtia-portalplc-programmingsiemensunit-testingaxunits7-1500
In the previous article, I showed what unit testing is and why it matters. Eight tests. One command. All passing — no PLC needed.
Now let us actually write those tests. Step by step, from an empty file to a passing test suite.
Everything in this article is real code from my demo project. If you have SIMATIC AX installed, you can follow along.
Who this is for: PLC programmers and automation engineers who work in TIA Portal and are exploring SIMATIC AX. You should have read Part 1: Unit Testing in SIMATIC AX Explained first — it covers what unit testing is and why it matters. This article picks up where that one left off.
This is the sixth post in my SIMATIC AX series. Previous posts: You Don’t Need AX Code IDE, Two Types of SIMATIC AX Projects, SIMATIC AX Project Structure Explained, Namespaces in SIMATIC AX Explained, and Unit Testing in SIMATIC AX Explained.
What You Need Before Starting
You need a SIMATIC AX project with at least one function block to test. Any function block will do — but to follow along with the examples in this article, here is the temperature controller I have been using throughout this series.
It is a simple ON/OFF controller with hysteresis and fault detection:
NAMESPACE Otomakeit.Demo.TempControl

    FUNCTION_BLOCK TempController

        VAR_INPUT
            i_rActualTemp  : REAL;    // Measured temperature
            i_rSetpoint    : REAL;    // Desired temperature setpoint
            i_rHysteresis  : REAL;    // Hysteresis band (both sides of setpoint)
            i_xEnable      : BOOL;    // Enable the controller
        END_VAR

        VAR_OUTPUT
            q_xHeating     : BOOL;    // Heating output
            q_xFault       : BOOL;    // Fault flag (temperature out of range)
            q_rError       : REAL;    // Control error: setpoint - actual
        END_VAR

        VAR
            _xHeatingState : BOOL;    // Latched heating state
        END_VAR

        VAR CONSTANT
            TEMP_MIN_VALID : REAL := REAL#-50.0;
            TEMP_MAX_VALID : REAL := REAL#500.0;
        END_VAR

        // Fault detection — sensor out of valid range
        IF i_rActualTemp < TEMP_MIN_VALID OR i_rActualTemp > TEMP_MAX_VALID THEN
            q_xFault := TRUE;
        ELSE
            q_xFault := FALSE;
        END_IF;

        // Error calculation
        q_rError := i_rSetpoint - i_rActualTemp;

        // Hysteresis control logic
        IF i_xEnable AND NOT q_xFault THEN
            IF i_rActualTemp < (i_rSetpoint - i_rHysteresis) THEN
                _xHeatingState := TRUE;
            END_IF;
            IF i_rActualTemp > (i_rSetpoint + i_rHysteresis) THEN
                _xHeatingState := FALSE;
            END_IF;
            q_xHeating := _xHeatingState;
        ELSE
            _xHeatingState := FALSE;
            q_xHeating := FALSE;
        END_IF;

    END_FUNCTION_BLOCK

END_NAMESPACE
Put this in src/Control/TempController.st in your project. Your project structure should look like this:
my-project/
├── apax.yml
├── src/
│   └── Control/
│       └── TempController.st
└── test/
    └── TempController_Test.st      ← this is what we are building
The test/ folder is where AxUnit looks for tests. If it does not exist yet, create it.
One more thing — your apax.yml already includes AxUnit as part of the standard @ax/sdk dependency. No extra packages to install.
The Anatomy of a Test File
Let me show you the complete test file first, then break down every piece.
USING AxUnit.Assert;
USING Otomakeit.Demo.TempControl;

NAMESPACE Otomakeit.Demo.Tests

    {TestFixture}
    CLASS TestTempController

        VAR
            _fb    : TempController;
            _clean : TempController;
        END_VAR

        {TestSetup}
        METHOD PUBLIC TestSetup
            _fb := _clean;
        END_METHOD

        {Test}
        METHOD PUBLIC WhenTempBelowLowerThreshold_HeatingTurnsOn
            _fb(
                i_rActualTemp  := REAL#94.0,
                i_rSetpoint    := REAL#100.0,
                i_rHysteresis  := REAL#5.0,
                i_xEnable      := TRUE
            );
            Equal(actual := _fb.q_xHeating, expected := TRUE);
            Equal(actual := _fb.q_xFault,   expected := FALSE);
        END_METHOD

    END_CLASS

END_NAMESPACE
That is a working test. Let me walk through each section.
The USING Statements
USING AxUnit.Assert;
USING Otomakeit.Demo.TempControl;
Two imports. The first brings in the AxUnit assertion methods — Equal, NotEqual, LessThan, and so on. The second imports the namespace where your function block lives.
If you have read the namespaces article, this is the same USING syntax. You are telling the compiler: “I need things from these namespaces.”
Without the first line, you would have to write AxUnit.Assert.Equal(...) every time. With it, you just write Equal(...).
The Test Namespace
NAMESPACE Otomakeit.Demo.Tests
Tests live in their own namespace. Convention: take your project namespace and add .Tests. This keeps test code separate from production code — they will never accidentally mix.
The Test Fixture
{TestFixture}
CLASS TestTempController
The {TestFixture} pragma tells AxUnit: “This class contains tests.” Without it, AxUnit ignores the class entirely.
The class name follows the pattern Test + the name of the function block you are testing. One class per function block. One file per class.
If you are coming from TIA Portal, a CLASS in Structured Text is similar to a FUNCTION_BLOCK — it holds variables and methods. The difference is that here, the “methods” are your individual tests.
The Variables
VAR
    _fb    : TempController;
    _clean : TempController;
END_VAR
Two instances of the function block you are testing. The first one (_fb) is the one you actually call in your tests. The second one (_clean) is never modified — it stays at its default values forever.
Why two? This is the setup for the reset pattern, which I explain next.
The Reset Pattern — Most Important Part
{TestSetup}
METHOD PUBLIC TestSetup
    _fb := _clean;
END_METHOD
The {TestSetup} pragma tells AxUnit: “Run this method before every single test.”
What it does: it copies the clean, never-touched instance into _fb. This resets the function block to its default state — all variables zeroed out, no residual state from the previous test.
This is critical. Without it, your tests affect each other. If Test A turns heating ON, then Test B starts with heating already ON. That means Test B might pass or fail depending on whether Test A ran first. Tests that depend on execution order are useless — you can never trust them.
The reset pattern guarantees every test starts from the same clean state. It does not matter if you run one test or all eight. It does not matter what order they run in. Each test is independent.
In TIA Portal terms: imagine if you could reset your function block’s instance data block to all zeros before every test scenario. That is exactly what this does — but automatically.
Your First Test
{Test}
METHOD PUBLIC WhenTempBelowLowerThreshold_HeatingTurnsOn
    _fb(
        i_rActualTemp  := REAL#94.0,
        i_rSetpoint    := REAL#100.0,
        i_rHysteresis  := REAL#5.0,
        i_xEnable      := TRUE
    );
    Equal(actual := _fb.q_xHeating, expected := TRUE);
    Equal(actual := _fb.q_xFault,   expected := FALSE);
END_METHOD
Three parts to every test:
1. The name. WhenTempBelowLowerThreshold_HeatingTurnsOn — this is not just a label. It is the specification. When you read the test results, this name tells you exactly what was tested and what the expected outcome is. Write names that read like sentences.
2. The action. Call the function block with specific inputs. Notice the typed literals — REAL#94.0, not just 94.0. SIMATIC AX requires explicit types. The setpoint is 100, hysteresis is 5, so the lower threshold is 95. An actual temperature of 94 is below that threshold.
3. The assertions. Equal(actual := _fb.q_xHeating, expected := TRUE) — check that the output matches what you expect. If it does not, the test fails and tells you exactly which assertion did not hold.
That is it. Setup, action, assertion. Every test follows this pattern.
The Assert Methods You Will Use
AxUnit gives you five assertion methods. In practice, you will use Equal about 90% of the time.
Equal — the workhorse:
Equal(actual := _fb.q_xHeating, expected := TRUE);
Equal(actual := _fb.q_rError, expected := REAL#20.0);
NotEqual — when you care that something is NOT a specific value:
NotEqual(actual := _fb.q_rError, expected := REAL#0.0);
LessThan and GreaterThan — for range checks:
LessThan(actual := _fb.q_rError, expected := REAL#50.0);
GreaterThan(actual := elapsed, expected := TIME#0S);
InRange — for values that should fall within bounds:
InRange(actual := scaledValue, lowerBound := REAL#99.5, upperBound := REAL#100.5);
All five take named parameters. Always actual first, then expected (or lowerBound/upperBound for InRange).
Testing Stateful Behavior — Multiple Calls
Some behavior only shows up after multiple calls. Hysteresis is the perfect example — you need to drive the function block into one state before you can test the transition.
Here is the hysteresis band test from my demo:
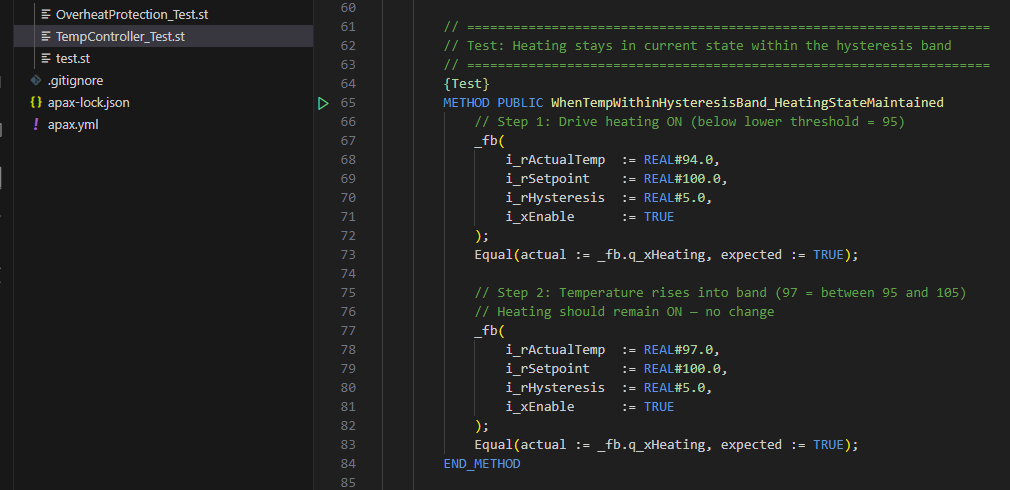
{Test}
METHOD PUBLIC WhenTempWithinHysteresisBand_HeatingStateMaintained
    // Step 1: Drive heating ON (below lower threshold = 95)
    _fb(
        i_rActualTemp  := REAL#94.0,
        i_rSetpoint    := REAL#100.0,
        i_rHysteresis  := REAL#5.0,
        i_xEnable      := TRUE
    );
    Equal(actual := _fb.q_xHeating, expected := TRUE);

    // Step 2: Temperature rises into band (97 = between 95 and 105)
    // Heating should remain ON — no change
    _fb(
        i_rActualTemp  := REAL#97.0,
        i_rSetpoint    := REAL#100.0,
        i_rHysteresis  := REAL#5.0,
        i_xEnable      := TRUE
    );
    Equal(actual := _fb.q_xHeating, expected := TRUE);
END_METHOD
First call: push the temperature below the lower threshold so heating turns ON. Second call: move the temperature into the hysteresis band (between 95 and 105). Heating should stay ON because we are still within the band.
This is testing real control logic. The kind of thing you would check with a watch table in TIA Portal — but here it is automated, repeatable, and self-documenting.
What to Test vs What to Leave for Commissioning
This is where practical experience matters. Not everything can or should be tested with AxUnit.
Test these things — they work great in unit tests:
- Control logic decisions (if this input, then that output)
- State machine transitions (idle to running to fault to reset)
- Fault detection (sensor out of range, interlock conditions)
- Calculations (error values, scaling, setpoint processing)
- Enable/disable behavior (disabled means safe state)
- Edge cases (what happens at the boundary values)
Leave these for commissioning on real hardware:
- Timers. This is the biggest gotcha. In unit tests, timers never advance. A TON timer output is always FALSE because there is no PLC scan cycle — no time passes between calls. If your logic uses a timer, test the logic around the timer, not the timer itself.
- Hardware I/O. Tests run on your PC. There is no real analog input card, no digital output. You simulate hardware inputs by setting values directly — which is great for testing your logic, but it does not prove the wiring works.
- Communication. Modbus, Profinet, S7 connections — too hardware-dependent for unit tests.
- Scan cycle behavior. Unit tests do not simulate cyclic execution. If your code depends on being called every 100 milliseconds, that timing does not exist in the test.
The split is clean: unit tests prove your logic is correct. Commissioning proves your system is connected correctly. Both are necessary. But one you can do at your desk every day, and the other requires a trip to the panel.
Running Your Tests
One command:
apax test
Run it from your project folder (where apax.yml is). AxUnit compiles your tests, runs them on your PC, and reports results:
Test Results: 9 passed, 0 failed
If a test fails, you get the test name, the assertion that failed, and the actual vs expected values. No guessing.
Some useful options:
apax test -c— run with code coverage report (shows which lines of your function block were exercised by tests)apax test -f "=WhenDisabled"— run only tests matching a filter (useful when debugging one specific test)
That is the workflow. Write code, write tests, run apax test. Change code, run apax test again. If nothing broke, keep going. If something broke, fix it now — not three weeks later at commissioning.
Putting It All Together — A Complete Test File
Here is the full test file from my TempController demo. Eight tests, eight scenarios, all passing:
USING AxUnit.Assert;
USING Otomakeit.Demo.TempControl;

NAMESPACE Otomakeit.Demo.Tests

    {TestFixture}
    CLASS TestTempController

        VAR
            _fb    : TempController;
            _clean : TempController;
        END_VAR

        {TestSetup}
        METHOD PUBLIC TestSetup
            _fb := _clean;
        END_METHOD

        {Test}
        METHOD PUBLIC WhenTempBelowLowerThreshold_HeatingTurnsOn
            _fb(
                i_rActualTemp  := REAL#94.0,
                i_rSetpoint    := REAL#100.0,
                i_rHysteresis  := REAL#5.0,
                i_xEnable      := TRUE
            );
            Equal(actual := _fb.q_xHeating, expected := TRUE);
            Equal(actual := _fb.q_xFault,   expected := FALSE);
        END_METHOD

        {Test}
        METHOD PUBLIC WhenTempAboveUpperThreshold_HeatingTurnsOff
            _fb(
                i_rActualTemp  := REAL#94.0,
                i_rSetpoint    := REAL#100.0,
                i_rHysteresis  := REAL#5.0,
                i_xEnable      := TRUE
            );
            Equal(actual := _fb.q_xHeating, expected := TRUE);

            _fb(
                i_rActualTemp  := REAL#106.0,
                i_rSetpoint    := REAL#100.0,
                i_rHysteresis  := REAL#5.0,
                i_xEnable      := TRUE
            );
            Equal(actual := _fb.q_xHeating, expected := FALSE);
        END_METHOD

        {Test}
        METHOD PUBLIC WhenTempWithinHysteresisBand_HeatingStateMaintained
            _fb(
                i_rActualTemp  := REAL#94.0,
                i_rSetpoint    := REAL#100.0,
                i_rHysteresis  := REAL#5.0,
                i_xEnable      := TRUE
            );
            Equal(actual := _fb.q_xHeating, expected := TRUE);

            _fb(
                i_rActualTemp  := REAL#97.0,
                i_rSetpoint    := REAL#100.0,
                i_rHysteresis  := REAL#5.0,
                i_xEnable      := TRUE
            );
            Equal(actual := _fb.q_xHeating, expected := TRUE);
        END_METHOD

        {Test}
        METHOD PUBLIC WhenDisabled_HeatingIsOff
            _fb(
                i_rActualTemp  := REAL#50.0,
                i_rSetpoint    := REAL#100.0,
                i_rHysteresis  := REAL#5.0,
                i_xEnable      := FALSE
            );
            Equal(actual := _fb.q_xHeating, expected := FALSE);
        END_METHOD

        {Test}
        METHOD PUBLIC WhenTempAboveMaxValid_FaultIsSet
            _fb(
                i_rActualTemp  := REAL#501.0,
                i_rSetpoint    := REAL#100.0,
                i_rHysteresis  := REAL#5.0,
                i_xEnable      := TRUE
            );
            Equal(actual := _fb.q_xFault,   expected := TRUE);
            Equal(actual := _fb.q_xHeating, expected := FALSE);
        END_METHOD

        {Test}
        METHOD PUBLIC WhenTempBelowMinValid_FaultIsSet
            _fb(
                i_rActualTemp  := REAL#-51.0,
                i_rSetpoint    := REAL#100.0,
                i_rHysteresis  := REAL#5.0,
                i_xEnable      := TRUE
            );
            Equal(actual := _fb.q_xFault,   expected := TRUE);
            Equal(actual := _fb.q_xHeating, expected := FALSE);
        END_METHOD

        {Test}
        METHOD PUBLIC ErrorEqualsSetpointMinusActual
            _fb(
                i_rActualTemp  := REAL#80.0,
                i_rSetpoint    := REAL#100.0,
                i_rHysteresis  := REAL#5.0,
                i_xEnable      := TRUE
            );
            Equal(actual := _fb.q_rError, expected := REAL#20.0);
        END_METHOD

        {Test}
        METHOD PUBLIC WhenActualExceedsSetpoint_ErrorIsNegative
            _fb(
                i_rActualTemp  := REAL#120.0,
                i_rSetpoint    := REAL#100.0,
                i_rHysteresis  := REAL#5.0,
                i_xEnable      := TRUE
            );
            Equal(actual := _fb.q_rError, expected := REAL#-20.0);
        END_METHOD

    END_CLASS

END_NAMESPACE
Eight tests. Each one tests a single, clearly named scenario. Each one starts with a clean function block instance. Each one ends with explicit assertions that either pass or fail — no human interpretation needed.
A Brief Word About Test-Driven Development
There is a practice in the IT world called test-driven development — TDD for short. The idea is: write the test first, before writing the actual code. The test defines what the code should do. Then you write the minimum code to make the test pass.
For PLC code, this might look like:
- Write a test: “When temperature is below lower threshold, heating turns ON”
- Run the test — it fails (the function block does not exist yet)
- Create the function block with just enough logic to pass that test
- Run the test — it passes
- Write the next test, repeat
I am not going to say you should always work this way. But the idea has merit — especially for complex control logic where you want to think through the behavior before you write the code.
At the very least, writing tests alongside your code (not months later) makes them much easier to write. You already know what the code is supposed to do. You already have the edge cases in your head. Capture them in tests while it is all fresh.
What is Next
This series on unit testing in SIMATIC AX has two articles so far:
- What unit testing is — and why TIA Portal engineers should care (read Part 1)
- How to write tests — the step-by-step guide you just read
There is more to explore — code coverage reports, testing state machines, debugging failed tests in VS Code, integrating tests into automated build pipelines. But the fundamentals are here. Create a test fixture, write tests with clear names, assert on outputs, run apax test. That is the workflow.
If you want to try it yourself and run into questions, connect with me on LinkedIn. I am still learning too — always happy to compare notes.